



Cable Lug Crimping Guide: Tools, Process and Quality Checks
A cable lug can be correctly sized on paper and still fail in service if the crimp is poor. Loose compression, incorrect die selection, incomplete conductor insertion, or surface oxidation can increase contact resistance and create excessive heat at the termination point.
For contractors, panel builders, and electrical distributors, cable lug crimping is not only an installation step. It is a quality-control point that affects electrical continuity, mechanical retention, and long-term reliability.
This guide explains how to select the correct lug and crimping die, complete the crimping process properly, identify common defects, and prepare the technical information needed when sourcing cable lugs for industrial or power-distribution projects.
Safety note: Cable termination work should be performed by trained and qualified personnel with the circuit isolated, following local electrical regulations and the lug manufacturer’s installation instructions.
What Must Be Confirmed Before Cable Lug Crimping?
Before choosing a cable lug crimping tool or die, confirm the following project details.
1. Conductor Material
The lug material must be compatible with the conductor material.
Common combinations include:
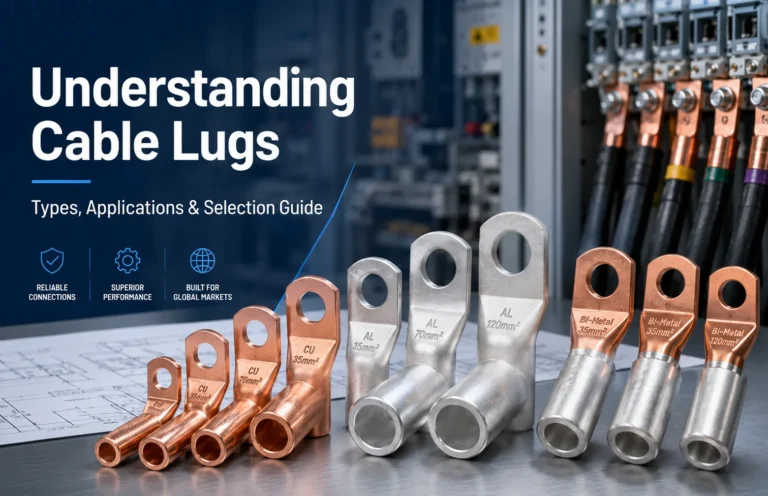
- Copper conductor with copper lug
- Aluminium conductor with aluminium lug
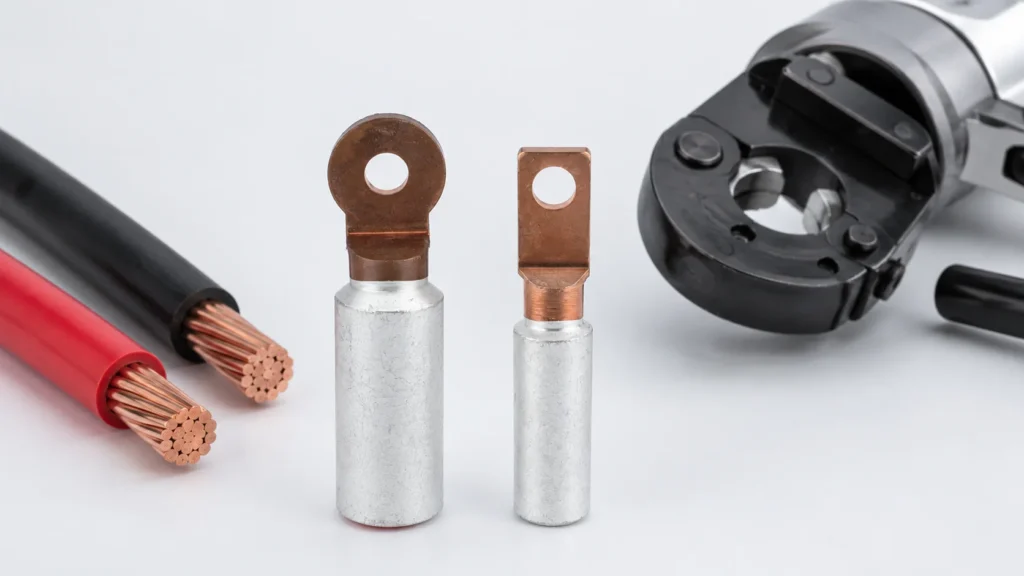
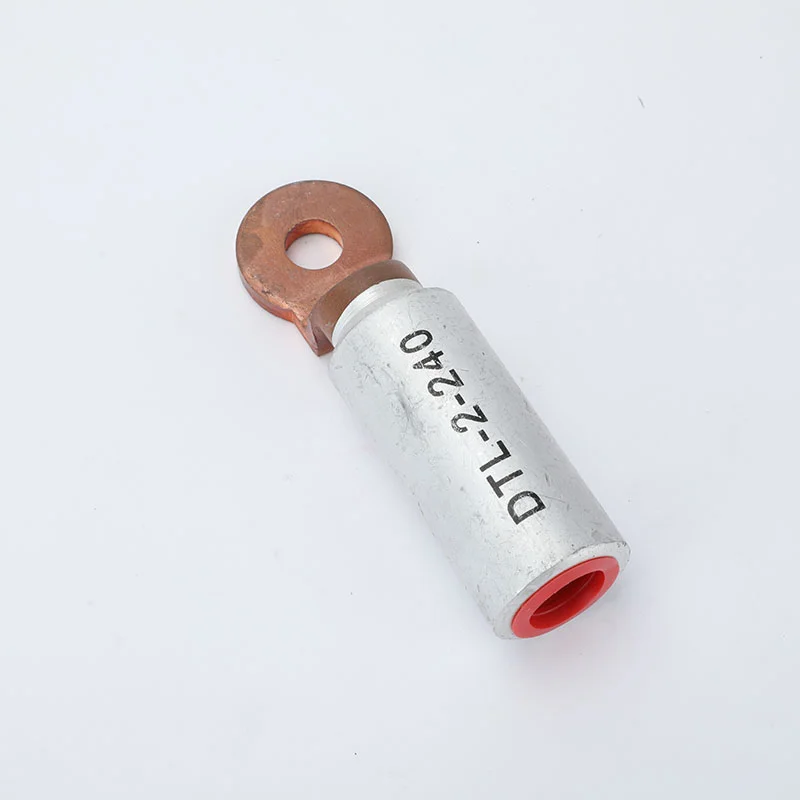
- Aluminium conductor connected to a copper busbar using a bimetallic cable lug
Using an incompatible material combination can increase the risk of corrosion and unstable electrical contact. For mixed copper and aluminium connections, a properly designed bimetallic lug is generally the safer option.
For a broader overview of lug materials and applications, see our guide to [What Are Cable Lugs].
2. Cable Cross-Sectional Area
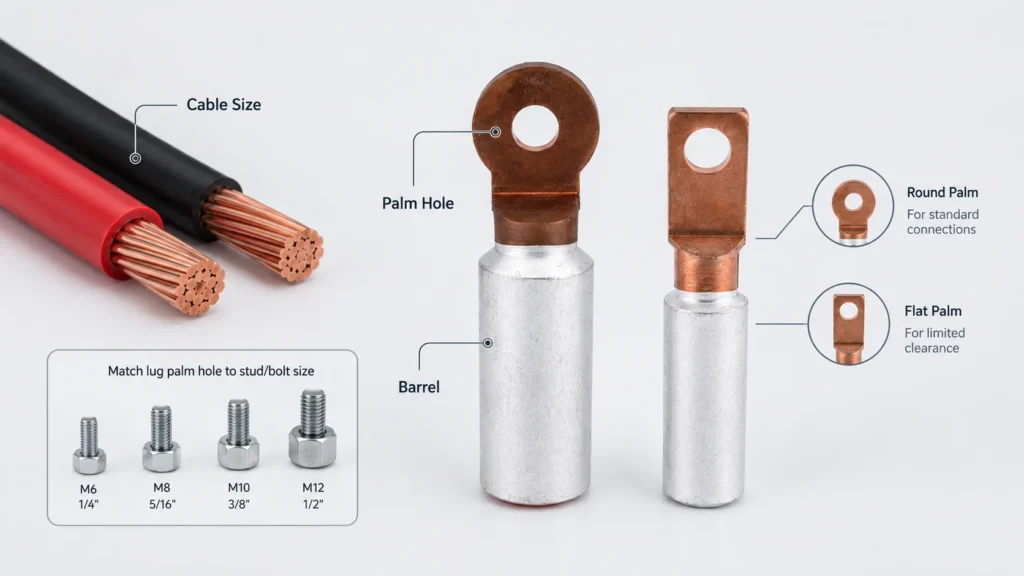
The cable size must match the lug barrel size.
For example, a 70 mm² conductor should be matched with a lug designed for 70 mm² cable. Do not select a lug based only on whether the conductor can physically fit inside the barrel.
A loose fit can reduce mechanical holding strength. An oversized conductor may damage the lug barrel or prevent full insertion.
3. Palm Hole Diameter
The lug palm hole must match the bolt or stud diameter of the busbar, circuit breaker, transformer terminal, grounding bar, or distribution equipment.
Common hole sizes include M6, M8, M10, M12, and M16, but the correct size must always be confirmed from the equipment drawing or site specification.
4. Installation Environment
The operating environment affects lug selection and termination protection.
Buyers should consider:
- Indoor or outdoor installation
- Humidity and rain exposure
- Coastal or corrosive environments
- High ambient temperature
- Vibration and mechanical movement
- Power distribution, grounding, switchgear, or renewable-energy application
For a quotation, provide your conductor material, cable size in mm², lug type, palm-hole diameter, application voltage, and estimated order quantity. This allows the supplier to recommend a suitable terminal model instead of sending a generic price list.For demanding environments, ask the supplier about surface treatment, material grade, corrosion protection, and compatible insulation accessories.
How to Choose the Right Cable Lug Crimping Tool
The best cable lug crimping tool depends on conductor size, lug type, installation volume, and project requirements.
Manual Crimping Tools
Manual crimping tools are commonly used for smaller cable sizes and lower-volume installation work.
They are suitable for field maintenance, light panel work, and smaller terminal applications. However, installers must ensure the tool has sufficient force and uses the correct die profile.
Hydraulic Crimping Tools
Hydraulic crimping tools are widely used for medium and large cable lugs because they provide more consistent pressure.
They are commonly selected for industrial panels, power distribution projects, transformer connections, and larger conductor sizes.
Battery-Powered Crimping Tools
Battery-powered crimping tools improve efficiency for repeated installation work.
They are useful for contractors working on large projects where speed, repeatability, and reduced manual effort are important. Some models also provide crimp-cycle monitoring or automatic pressure control.
Crimping Dies
The crimping die is just as important as the tool itself.
Always confirm:
- Die size
- Die profile
- Lug barrel type
- Conductor material
- Recommended crimping sequence
- Manufacturer instructions
Do not assume that one die works for every lug with the same cable size. Different lug designs may require different die profiles or compression patterns.
How to Crimp Cable Lugs Correctly: Step-by-Step Process
Step 1: Check the Lug and Cable Specification
Before starting, confirm the lug size, conductor material, palm-hole diameter, and application requirement.
Inspect the lug for cracks, deformation, oxidation, damaged plating, or contamination inside the barrel.
Step 2: Cut the Cable Cleanly
Use a suitable cable cutter to create a clean, even cable end.
Avoid crushing or flattening the conductor during cutting. A damaged cable end can make insertion difficult and affect the final crimp quality.
Step 3: Strip the Insulation to the Correct Length
Strip only enough insulation to allow the conductor to fully enter the lug barrel.
If too much conductor is exposed, the installation may have insufficient insulation support. If too little insulation is removed, the conductor may not fully enter the barrel.
The stripped length should follow the lug manufacturer’s recommendation.
Step 4: Prepare the Conductor Surface
For copper conductors, ensure the strands are clean and undamaged.
For aluminium conductors, surface oxidation requires more attention. Follow the manufacturer’s instructions regarding brushing, cleaning, or the use of oxide inhibitor. Do not use compounds that are not approved for the specific connection system.
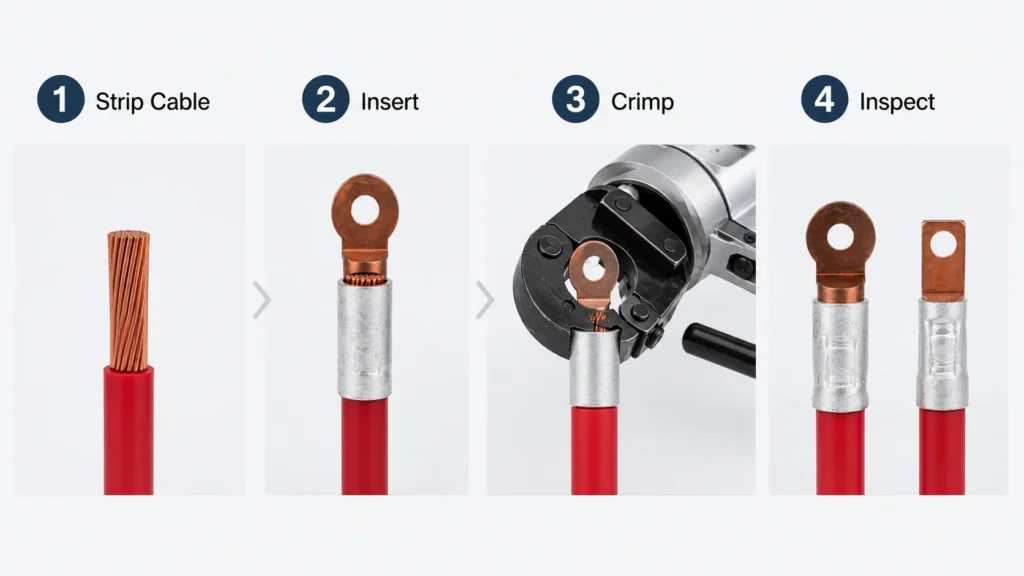
Step 5: Insert the Conductor Fully
Insert the conductor into the lug barrel until it reaches the correct position.
The conductor should not stop halfway inside the barrel. Incomplete insertion reduces both electrical contact area and mechanical retention.
Before crimping, check that the cable insulation is positioned close to the barrel entrance without entering the compression zone.
Step 6: Position the Lug in the Correct Die
Place the lug barrel in the correct die position.
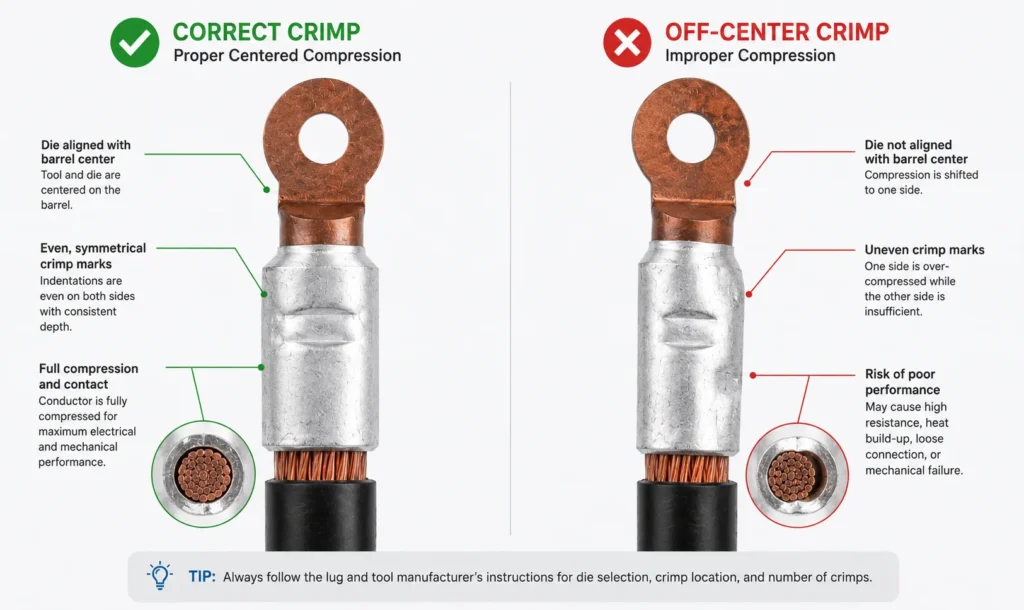
Keep the lug straight and stable. A tilted or off-center lug can create uneven compression and damage the barrel.
For long-barrel lugs, more than one crimp may be required. Follow the manufacturer’s recommended crimp direction and sequence.
Step 7: Complete the Crimp
Apply the crimp using the selected tool and die.
The compression should be complete, even, and free from visible cracking. Do not stop the tool cycle early or use partial compression as a final crimp.
Step 8: Inspect and Protect the Termination
After crimping, inspect the connection before applying heat shrink, insulation tape, terminal covers, or other protective accessories.
Where required, mark the completed connection for traceability or inspection records.
Common Cable Lug Crimping Defects
1. Wrong Die Size
Using a die that is too large may create insufficient compression. Using a die that is too small may crack the lug barrel or damage conductor strands.
How to prevent it: Match the die to the lug manufacturer’s recommended specification.
2. Incomplete Conductor Insertion
If the conductor is not fully inserted, the effective contact area is reduced.
Possible result: High resistance, excessive heat, and reduced pull-out strength.
How to prevent it: Confirm conductor depth before crimping.
3. Over-Stripped Insulation
Excessively stripped cable leaves too much exposed conductor.
Possible result: Reduced insulation protection and a less secure installation.
How to prevent it: Strip only to the recommended barrel insertion length.
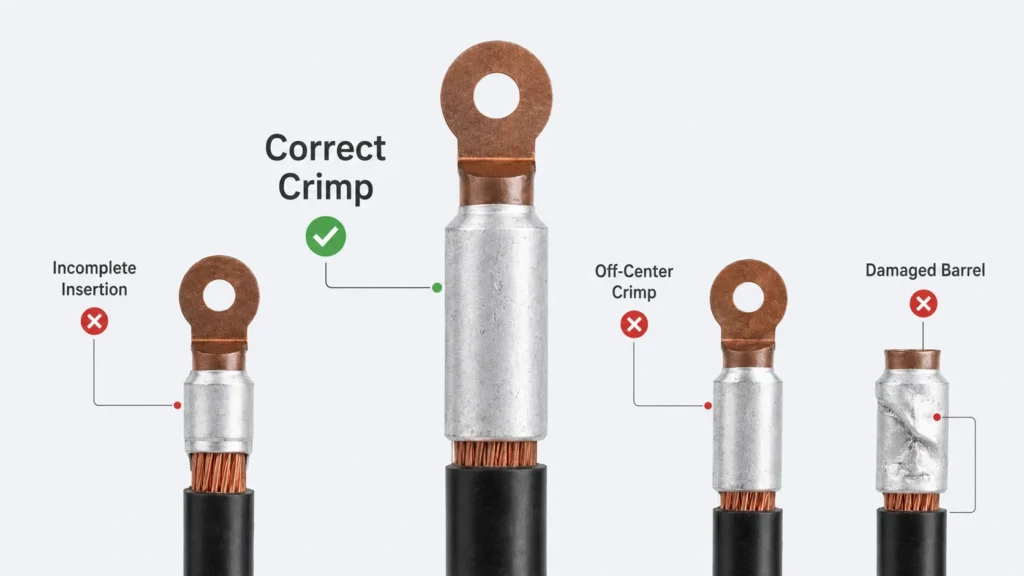
4. Cracked Lug Barrel
A cracked barrel may result from incorrect die selection, excessive compression force, poor alignment, or unsuitable lug material.
How to prevent it: Stop using any damaged lug and review tool, die, and cable compatibility.
5. Uneven or Off-Center Crimp
An off-center crimp can reduce conductor contact and weaken mechanical retention.
How to prevent it: Keep the lug straight in the die and stabilize the cable during compression.
6. Damaged Conductor Strands
Damaged, cut, or twisted strands reduce current-carrying consistency and mechanical performance.
How to prevent it: Use proper stripping tools and avoid aggressive handling of the exposed conductor.
Cable Lug Inspection Checklist
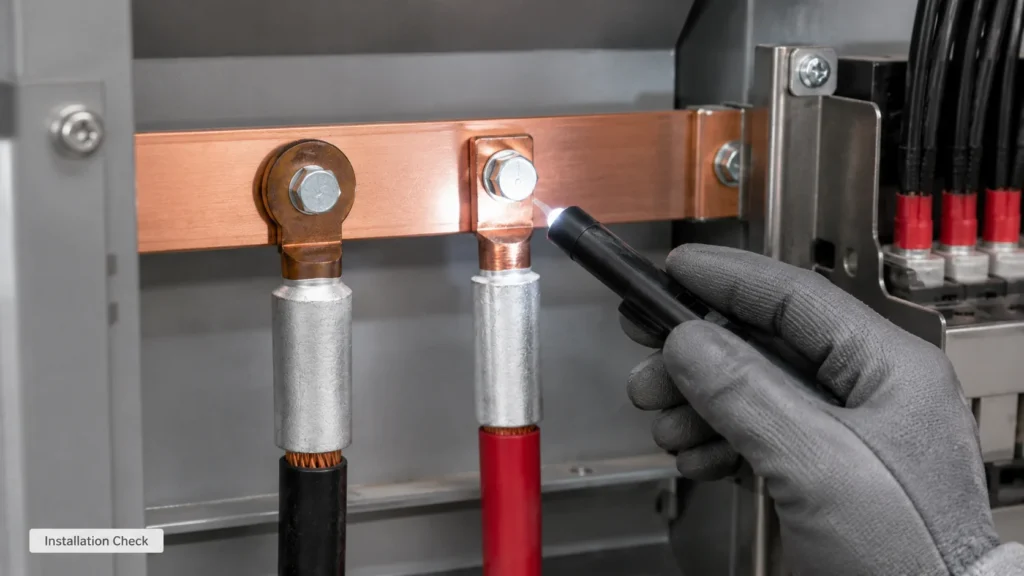
A completed cable lug crimp should be checked before the assembly is energized.
Visual Inspection
Check for:
- Correct lug size and material
- Correct palm-hole diameter
- Full conductor insertion
- Even compression
- No visible cracking
- No damaged conductor strands
- No excessive exposed conductor
- No sharp edges or distorted lug palm
Mechanical Inspection
Depending on project requirements, quality checks may include:
- Pull-out or tensile testing
- Crimp profile verification
- Dimensional inspection
- Installation torque confirmation for bolted connections
Electrical Inspection
For higher-reliability installations, project specifications may require verification such as:
- Contact resistance measurement
- Temperature-rise monitoring
- Heat-cycle testing
- Short-circuit withstand testing
- Installation records and traceability
The exact test method should be agreed between the buyer, installer, and supplier according to the application and applicable project standard.
For low-voltage power cable terminations, project specifications may reference IEC 61238-1-1 when defining test requirements for compression and mechanical connectors.
What Buyers Should Ask a Cable Lug Supplier
When requesting a quotation, do not ask only for a price.
Provide the following information:
- Conductor material: copper, aluminium, or mixed connection
- Cable cross-sectional area in mm²
- Lug type: copper, aluminium, bimetallic, open-end, tubular, or other
- Palm-hole diameter or bolt size
- Application: panel, switchgear, transformer, grounding, solar, or power distribution
- Required quantity
- Required surface treatment or corrosion protection
- Required packaging, labeling, or OEM requirements
- Any drawings, standards, or test-document requirements
This information helps the supplier recommend a compatible cable lug model rather than sending a generic catalog.
For project-specific cable termination support, contact GGLDF with your cable material, cable size, palm-hole diameter, and application details. Our team can help identify a suitable cable lug model and quotation.
Frequently Asked Questions
How do I know which crimping die to use for a cable lug?
Use the die recommended for the specific lug model, cable size, and conductor material. Do not select a die based only on cable size, because barrel design and crimp profile may differ between manufacturers.
Can I use a copper lug on an aluminium cable?
It is not recommended unless the lug is specifically designed for that connection. For copper-to-aluminium applications, use a suitable bimetallic cable lug or an approved transition solution.
How many crimps are needed for one cable lug?
The required number of crimps depends on the lug barrel length, conductor size, tool type, and manufacturer instructions. Large or long-barrel lugs may require multiple compressions.
What causes a cable lug to overheat?
Common causes include insufficient compression, wrong die selection, incomplete conductor insertion, corrosion, poor torque at the bolted connection, or using an incorrectly sized lug.
Can a cracked cable lug still be used?
No. A cracked lug should be rejected because the crack can reduce mechanical strength and electrical reliability.
What information should I send when requesting cable lugs?
Send the conductor material, cable size, lug type, palm-hole diameter, installation application, drawings if available, and required order quantity.