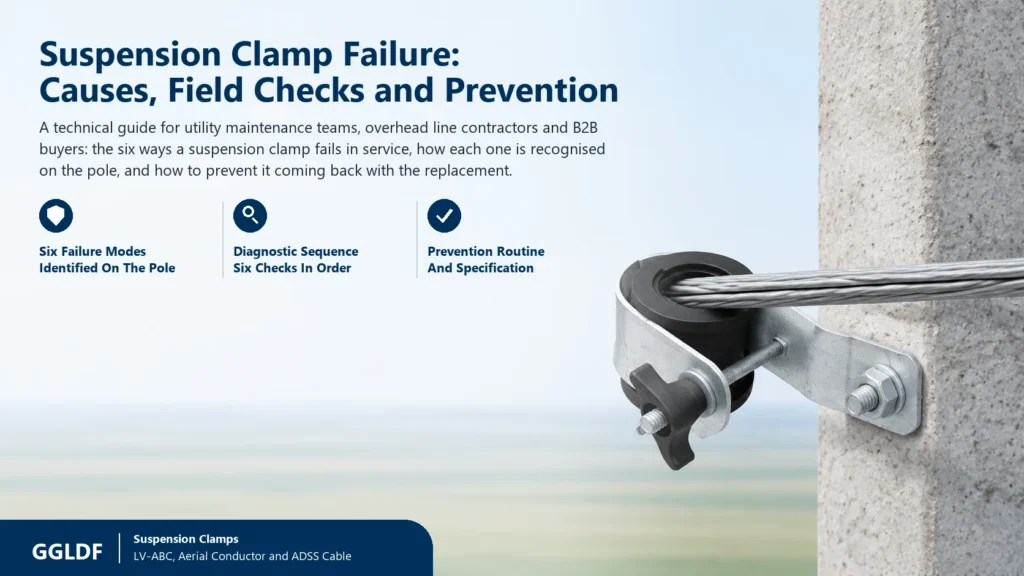
Suspension Clamp Failure: Causes, Field Checks and Prevention
A suspension clamp failure rarely looks like a break. It looks like the fitting slowly losing the one thing it was bought to do: holding the conductor without damaging it. Most cases of clamp failure on an overhead line trace back to a small number of conditions – a bolt that was never fully torqued, a rubber insert that has gone hard and cracked, fatigue at the bracket, corrosion of the galvanized coating, or a clamp that was never the right size for the cable it is holding.
That distinction matters when you are standing under the pole trying to decide whether to re-torque, replace, or leave it alone. A clamp that has lost grip and a clamp that is over-gripping look similar from the ground but call for opposite responses, and treating one as the other is how a joint that was merely loose becomes a conductor that is damaged.
This guide sets out the six failure modes that account for most in-service problems, how each one presents on the pole, how to tell them apart, which ones your own installation practice causes, and what to confirm before your next order so the same failure does not come back with the replacement.
What the clamp is asked to do
A suspension clamp is a supporting fitting. It carries the weight of the conductor across a span plus the transverse loads from wind and ice, and it lets the conductor move a small amount lengthwise so that tension equalises along the line as temperature changes. It does not carry the longitudinal tension of the line – that is the job of the tension clamp at dead-end and angle structures. If you are still separating the two roles, the comparison of suspension clamps against tension clamps covers the load paths.
That combination – vertical load plus controlled slip – is exactly what makes the fitting vulnerable. A part that only had to hold still could be made rigid. The clamp has to grip firmly enough to support the conductor and gently enough not to crush it or wear through its surface, across a service life measured in decades of vibration and thermal cycling. Every failure mode below is a way that balance is lost.
Six suspension clamp failure modes and what each looks like
The useful thing about these six is that each leaves a different signature. You do not need instruments to separate most of them; you need to know which detail to look at.
1. Grip loss and conductor slip
This is the most common and the most misread. The clamp has not broken – it simply stopped holding, and the conductor has crept through the groove. On the pole the giveaway is a bright, polished band on the conductor where it has been moving against the clamp, often with the clamp body sitting off-centre on the cable. Sag on that span may have increased.
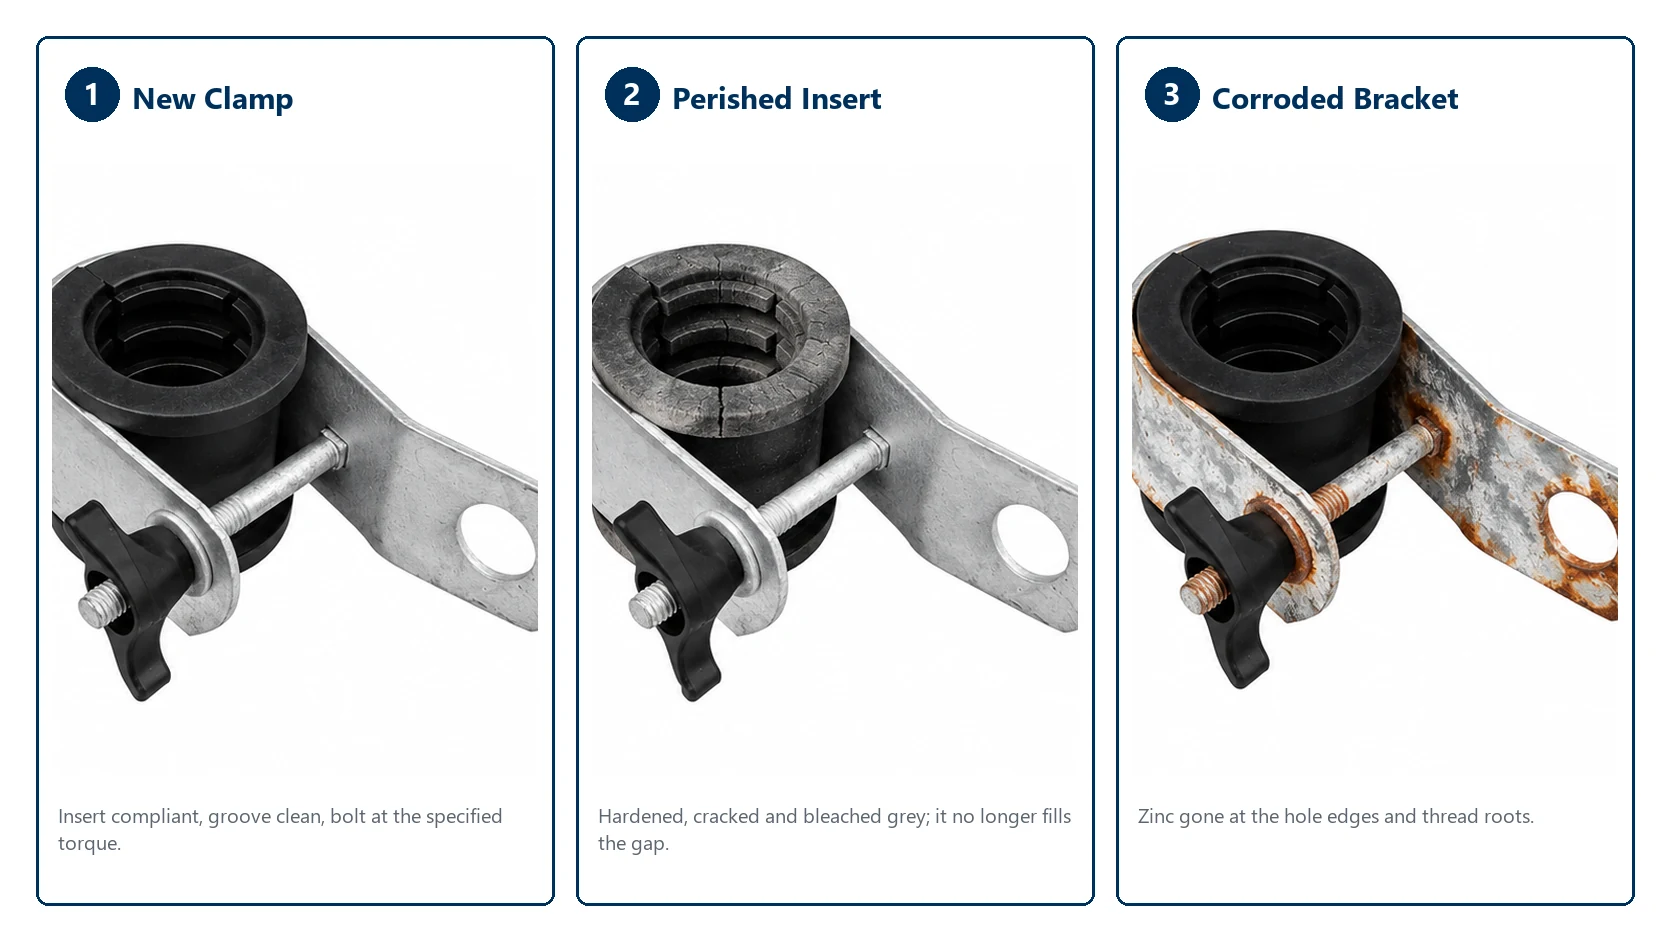
There are four usual causes, and they are worth separating because only one of them is fixed by tightening. The bolt may be under-torqued from installation. The rubber insert may have taken a permanent compression set and no longer fills the gap. The groove may be too large for the cable, so the clamp closes on itself before it closes on the conductor. Or the span has been loaded beyond what it was designed for by ice or wind, in which case the clamp is reporting a problem that belongs to the line design.
2. Conductor damage from over-clamping
This is the failure that installers cause while trying to prevent the first one. A clamp that is too small for the cable, or a bolt tightened past the point the clamp was designed for, crushes the conductor. Aluminium strands deform first; the outer layer flattens, then individual wires score or break at the contact edges. On the pole you see flattened or marked strands under the clamp, and sometimes a few broken outer wires at the edge of the groove.
The repair is not cosmetic. A crushed conductor is a stress concentration and a hot spot waiting for a load cycle. This is also why you should never take a torque figure from another clamp model or from a general rule of thumb – the correct value belongs to that specific clamp, and it should come off the manufacturer’s drawing or assembly instruction.
3. Fatigue at the bracket and pivot
Aeolian vibration – the small, high-frequency oscillation wind induces on the leeward side of a conductor – puts millions of low-amplitude cycles through the fitting. The energy concentrates where the section changes: the bend of the bracket, the pin of the pivot, the root of the eye. The result is a hairline crack that starts on a tension face and grows.
On the pole, look for a crack at the bend radius, an eye that has become oval rather than round, or visible movement at the pivot that should be tight. Long spans in flat, open terrain and spans crossing a valley are the usual locations, because the exposure and the vibration energy are both higher there. Where vibration is expected, the answer is usually armour rods or a damper rather than a heavier clamp.
4. Corrosion of the bracket and fasteners
Hot-dip galvanizing protects steel by sacrificing the zinc layer, so a coating that is intact works well and a coating that is broken stops working quickly. The common entry points are cut edges, threads and the inside of holes – and the most common cause of damage is handling: dragging a bundle across a truck bed, or using the bracket as a lever during installation.
White or red rust blooming around the bolt holes and thread roots, or zinc flaking at an edge, means the local coating has gone. In a coastal or industrial atmosphere that progresses faster, and the section that corrodes first is usually the one carrying the load. Galvanizing quality is normally specified to ISO 1461; if the coating is failing early, the question is whether it was damaged in handling or never met the specification.
5. Fastener loosening
Bolted joints in a vibrating structure lose preload. Thermal cycling adds to it, because the clamp body, the bolt and the conductor expand at different rates. A plain nut can back off far enough over years for the grip to fall away; a nylon-insert nut resists that but is not immune, especially if it has been reused.
The field check is simple if someone thought ahead: a witness mark across nut and bolt shows at a glance whether anything has moved. Without one, look for a nut sitting proud of where the thread ends, bright fretting marks under the nut face, or a bolt that turns without resistance. Reusing a nut, using a lower-grade fastener than the clamp was supplied with, or leaving out a washer all shorten the time to the next problem.
6. The wrong clamp for the cable
The last mode is a selection error, and it produces a mixture of the first five. A clamp chosen by model name rather than by measured cable diameter and construction will either sit loose or close too hard. A clamp intended for a stranded conductor, used on a cable with a much lower allowable radial pressure, will damage the cable even when it is installed correctly and torqued exactly as specified.
This is where most field confusion originates, because the clamp looks right and measures almost right. The cable range on the clamp is a design range for a specific cable type; being inside the range is necessary but not sufficient.
| Failure mode | What you see on the pole | Usual root cause | First check |
|---|---|---|---|
| Grip loss and slip | Polished band on the conductor, clamp off-centre, increased sag | Bolt under-torqued, insert compressed, groove too large, span overloaded | Witness mark on nut and bolt; insert thickness; measured cable diameter against the clamp range |
| Conductor damage | Flattened or scored strands at the contact area, broken outer wires | Groove too small, bolt overtightened, hard clamp body against aluminium without a liner | Groove radius, and whether the clamp is specified for that cable construction |
| Bracket or pivot fatigue | Hairline crack at the bend, oval eye, movement at the pivot | Aeolian vibration on exposed or long spans, off-axis loading | Span length and terrain exposure; whether armour rods or a damper were specified |
| Corrosion | White or red rust at holes and thread roots, flaking zinc at edges | Coating damaged in transit or installation, aggressive atmosphere | Coating condition at cut edges and threads; atmosphere category for the route |
| Fastener loosening | Nut backed off the witness mark, fretting under the nut face | Vibration plus thermal cycling, reused nut, wrong fastener grade | Nut type and grade marking; whether the joint has been reopened before |
| Wrong clamp for the cable | Cable loose in an oversized groove, or sheath and insulation deformed | Selected by model name rather than diameter and cable type | Measured cable outside diameter and construction against the stated cable range |
How to diagnose a suspension clamp failure on the pole
Work from the outside in. The order below resolves most cases without a return visit, and it costs nothing but discipline about sequence.
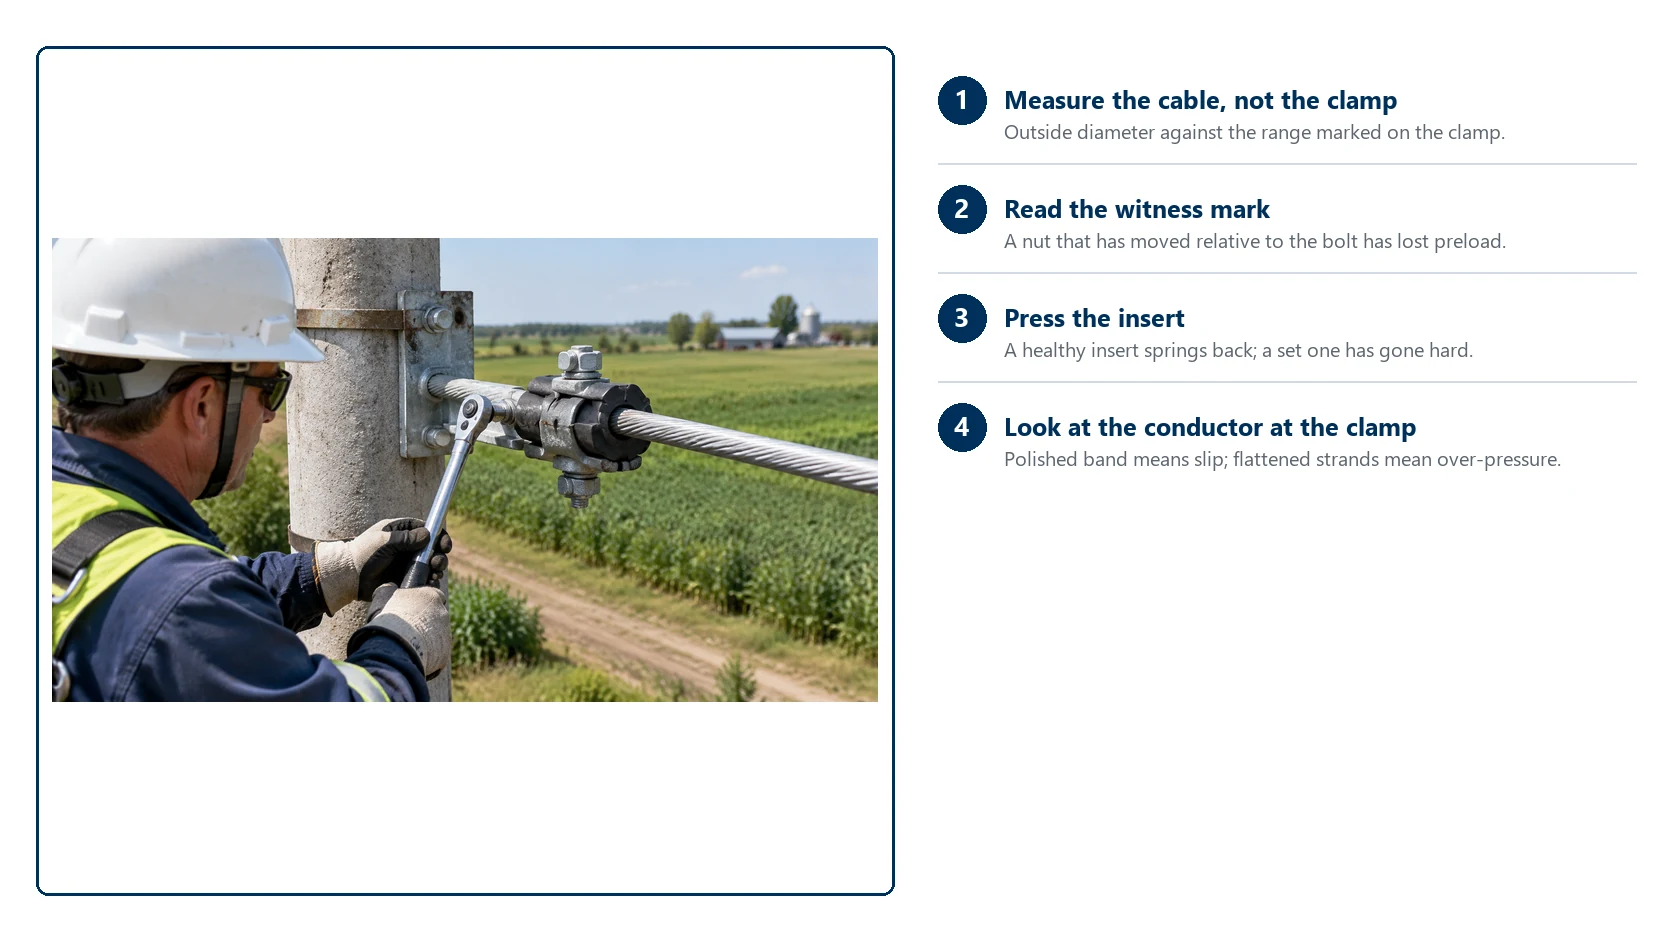
- Measure the cable, not the clamp. Take the outside diameter at the clamp and compare it with the range the clamp is marked for. If it is outside the range, or at the extreme end of it, you have found the cause and no amount of torque will correct it.
- Read the witness mark. If the nut has moved relative to the bolt, the joint has lost preload. If there is no witness mark, check for fretting dust under the nut face and for a nut sitting proud.
- Press the insert. A healthy rubber or polymer insert is compliant and springs back. One that has gone hard, cracked along the groove, or bleached grey has taken a compression set and is no longer filling the gap.
- Look at the conductor where it sits. A polished, bright band means movement. Flattened, scored or broken strands mean over-pressure. Both can be present on the same span if the clamp lost grip first and was subsequently over-tightened.
- Check the bracket for cracks at the bend and the eye for ovality, using a light at a low angle – cracks in the bend radius are easy to miss in flat light.
- Check coating condition at the hole edges and threads, not on the flat faces, which always look better than the areas that matter.
Installation errors and selection errors are not the same problem
Separating these two stops you from fixing the same line twice. An installation error is corrected by better practice on site. A selection error is corrected only by a different part number, and tightening it harder will make the outcome worse rather than better.
| Failure mode | Installation error | Selection error |
|---|---|---|
| Grip loss and slip | Yes – under-torque, cable not seated fully in the groove | Yes – groove at the top of the range, insert not matched to the cable |
| Conductor damage | Yes – overtightening, clamp used as a lever | Yes – groove too small, no liner for a soft conductor |
| Fatigue | Rarely | Yes – clamp or protection not specified for the span and exposure |
| Corrosion | Yes – coating damaged in handling | Yes – standard coating specified for a coastal or industrial route |
| Fastener loosening | Yes – reused nut, missing washer, wrong grade | Rarely |
| Wrong clamp for the cable | No | Yes – always |
In practice, a clamp that has already slipped once should be replaced rather than re-tightened. The insert has taken a set against that conductor, the groove surface has worn, and the assembly will not reproduce its original grip. Re-tightening buys a season at best and hides a joint that is now unpredictable.
Where fibre cable fails differently
The failure modes above are written for conductor, and applying them unchanged to all-dielectric self-supporting cable is a mistake. With ADSS, the governing limit is the allowable radial pressure and the resulting strain in the fibre, not the grip strength of the metal. A clamp that is perfectly adequate on a conductor of the same diameter can over-compress an ADSS cable and degrade the optical performance without any visible external damage.
That is why the insert, the contact area and the tightening method matter more than the bracket on fibre routes, and why the failure presents as an optical problem rather than a mechanical one. The specific requirements for ADSS cable support are set out separately, and they are worth reading before you standardise one clamp type across a mixed conductor and fibre network.
What to confirm before the next order
Most of these failures are decided at the quotation stage, months before anyone climbs the pole. Six questions cover it:
- The cable range, stated as diameter, with the cable type it applies to. A range without a cable type is only half a specification.
- The basis of the mechanical rating. Ask whether the quoted figure is a failing load or a working load, and what test it is derived from. IEC 61284 covers the requirements and tests for overhead line fittings, including vertical damage and failure load and a slip test, but the acceptance percentage is set by the purchaser’s specification rather than by the standard alone. What the test does and does not prove is worked through in grip strength and the slip test.
- The insert material and its intended service life. The rubber or polymer is the part that degrades first in most climates, and it is rarely the part specified in detail.
- The galvanizing specification. ISO 1461 is the usual reference; ask for the coating class, not just the word “galvanized”.
- The fastener grade and the lock type. A nylon-insert nut is not a detail if the alternative is a plain nut on a vibrating structure.
- The torque value, on paper, for that clamp. If it is not in the quotation or the drawing, it will be guessed on site.
If you want to compare models on the two figures that drive most of these decisions – cable range and breaking load – the suspension clamp range lists both for each model, together with budget pricing and minimum order quantities. For a single worked example of a bracket-type body, the PS435 bracket clamp page shows the construction that most of this article describes.
A maintenance routine that catches suspension clamp failure early
Failures are cheap to find early and expensive to find late, and the inspection that catches them is not specialised. At each scheduled line patrol, check three things at every suspension point: the witness mark on the nut, the condition of the insert, and the coating at the hole edges. That takes less than a minute per pole and catches grip loss, insert ageing and early corrosion together.
After any event that loads the line abnormally – ice, a storm, a vehicle strike on a stay – add the conductor surface at the clamp to that list, because a clamp that slipped during the event will show it as a polished band. Any span where sag has visibly changed should be treated as a slip case until proven otherwise.
Replace rather than re-torque where the insert has hardened, the conductor shows wear, or the bracket shows any cracking at the bend. And if the same failure appears at several poles on one route, stop treating it as a maintenance issue: it is almost always a specification issue, and the next order is where it gets fixed. The wider set of overhead line components is a useful reference when the problem turns out to sit with the insulator string or the pole hardware rather than the clamp itself.
Frequently asked questions
Does the clamp carry the full tension of the conductor?
No. It carries the vertical weight of the conductor across the span and the transverse loads from wind and ice, while allowing limited longitudinal movement. The line tension is taken by tension clamps at dead-end and angle structures, which is why the two fittings are never interchangeable.
What makes a suspension clamp slip?
In rough order of frequency: a bolt that is not torqued to the value specified for that clamp, an insert that has hardened and no longer fills the gap, a groove that is too large for the measured cable diameter, and a span that has been loaded beyond its design by ice or wind.
Can a suspension clamp be reused after it has been removed?
It is better treated as a single-use part. Once the insert has taken a compression set against a particular conductor and the groove surface has worn, re-clamping gives a lower and less predictable grip. Where a joint has been opened on a long-service line, fit a new clamp.
Why is the conductor damaged where it sits in the clamp?
Usually over-pressure: a groove that is too small for the cable, a bolt tightened beyond the specified torque, or a hard clamp body bearing directly on aluminium without a liner. Vibration fretting can produce similar marking over time, but the flattened strands of over-clamping look different from a polished wear band.
How often should the clamp bolts be checked?
At every scheduled line patrol is the practical answer, plus a check after any abnormal loading event. Some utilities also do a first-cycle check a few weeks after stringing, because inserts settle under their initial load. The interval belongs to the utility’s own inspection standard; what matters is having a witness mark that makes the check take seconds.
Is one clamp type enough for a mixed conductor and fibre network?
Usually not. ADSS and OPGW cable are limited by allowable radial pressure rather than by grip strength, so a clamp chosen for conductor of the same diameter can over-compress a fibre cable. Treat the fibre fittings as a separate selection.
The practical takeaway
Almost every failure you will find on a line is one of six, and five of the six are decided before the clamp reaches site – by which model was ordered, how it was specified, and how it was handled. The inspection on the pole is the easy part once you know which detail belongs to which mode.
If you are specifying a replacement or a new route, send the conductor or cable type, the measured outside diameter, the span and the atmosphere category. We will confirm the matching model, its cable range and its mechanical rating, and state the torque value with the drawing rather than leaving it to be guessed. You can send those details to our technical team for a model recommendation.