



Mechanical Cable Lugs: When to Choose Them Over Crimp Lugs
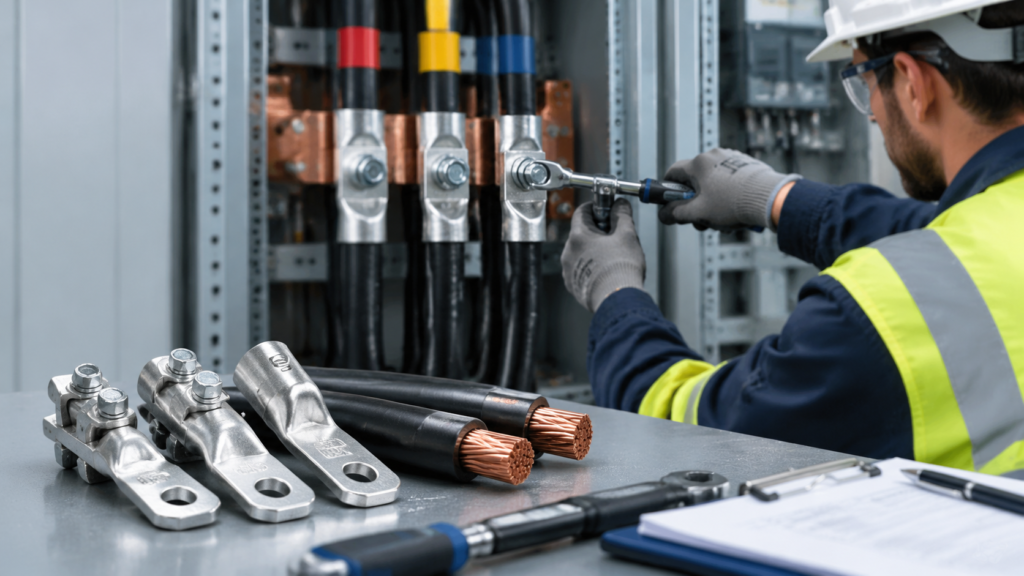
The cable is ready to terminate, but the correct crimp die is not on site. A mechanical lug may solve the tooling problem—provided it is approved for the conductor, terminal, and installation conditions. Mechanical cable lugs secure the conductor with bolts or screws inside the lug body instead of compressing the barrel with a crimping die.
That distinction sounds simple, but it affects how you select and install the termination. This guide explains the practical trade-offs, the details to check before ordering, and how to avoid common mistakes with bolted cable connections.
How Do Mechanical Cable Lugs Work?
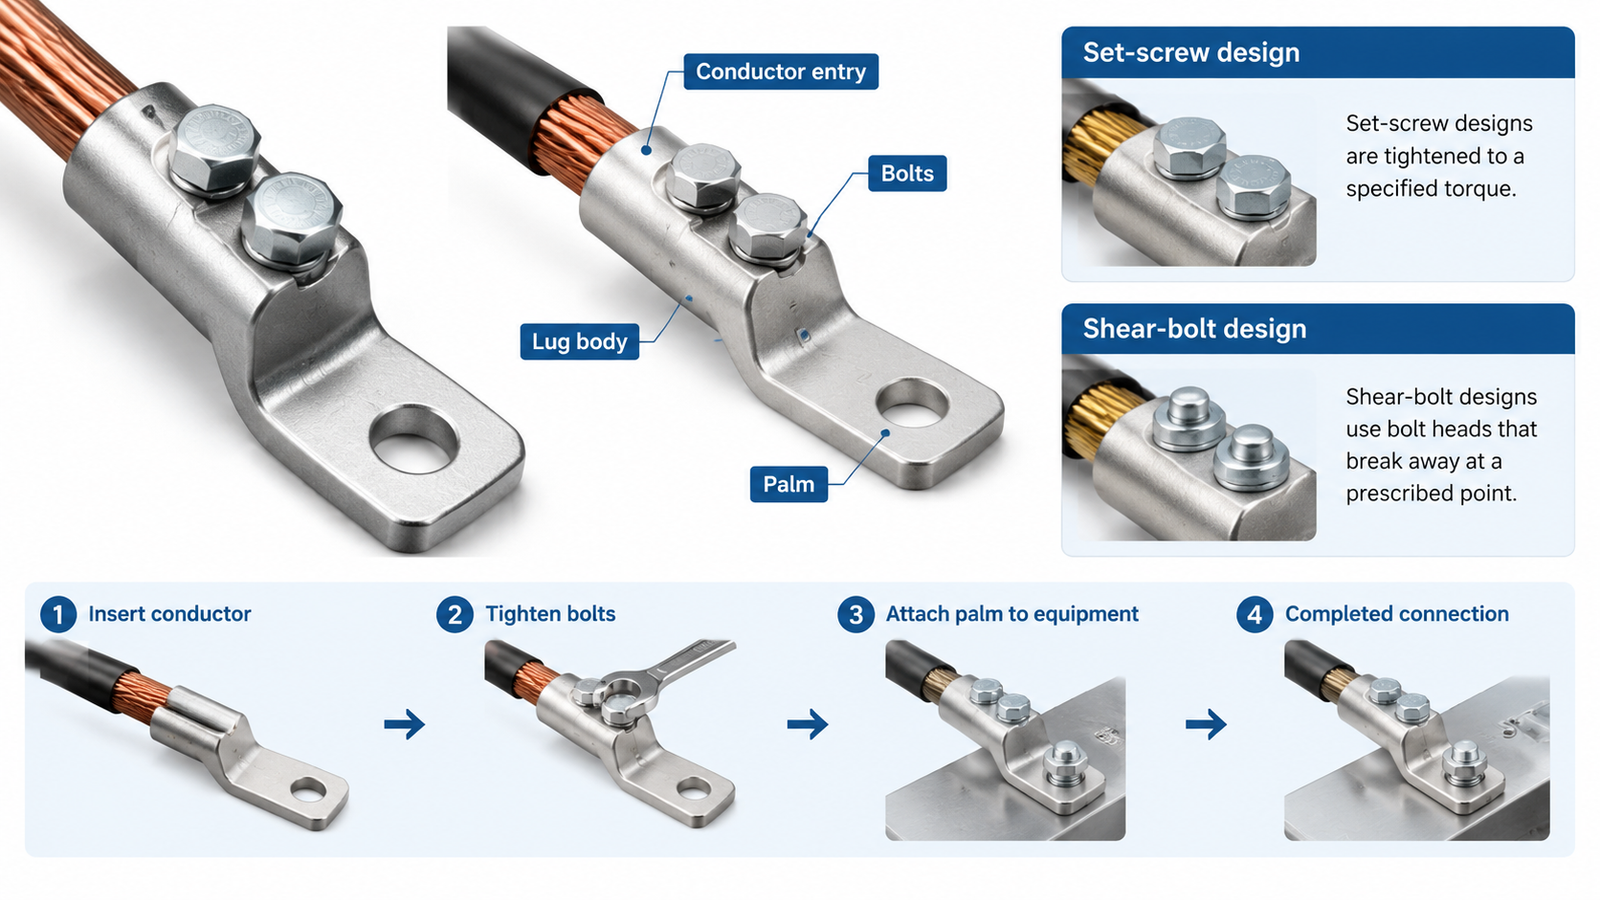
A mechanical cable lug has a conductor entry and a palm that attaches to equipment. After the conductor is inserted, one or more bolts create contact pressure between the conductor and the lug body. The palm is then fastened to the equipment terminal or busbar.
There are different bolt designs. A conventional set-screw lug is tightened to the torque specified for that product. A shear-bolt lug uses bolt heads designed to break away at a prescribed installation point. These are different fastening systems; do not assume that a lug is a shear-bolt design simply because it has bolts, and do not apply a generic torque value to either type.
Mechanical lugs are often considered for field installations, repair work, or projects where matching crimp tooling is difficult to obtain. Their suitability still depends on the exact model’s conductor range, material compatibility, terminal geometry, and project requirements.
Mechanical Lugs vs Crimp Lugs: Which Is the Better Fit?
| Selection factor | Mechanical cable lug | Crimp cable lug |
|---|---|---|
| Conductor attachment | Bolts or screws apply pressure inside the lug | Matched tool and die compress the lug barrel |
| Main installation tools | Tool specified for the bolts; sometimes a torque wrench, depending on design | Specified crimp tool and die |
| Size flexibility | Some models accept a defined range of conductor sizes | Usually selected for a specific conductor size and construction |
| Key quality check | Correct conductor insertion and specified bolt tightening sequence | Correct die, crimp locations, and completed compression |
| Main buying risk | Assuming any similarly sized conductor or terminal will fit | Assuming a die fits solely because the cable size matches |
Neither connection method is automatically more reliable. A well-matched crimp lug installed with the correct tool can be a sound choice for repeated production work. A properly specified mechanical lug can simplify field work when its approved conductor range and installation instructions match the job. The deciding factor is the complete connector system, not whether one method sounds easier.
For the general crimp process, see GGLDF’s cable lug crimping guide. This article focuses on specifying mechanical cable lugs and choosing between the two connection methods.
Five Checks Before Ordering Mechanical Cable Lugs
1. Match conductor material and construction
Record whether the cable is copper or aluminum, its nominal cross-section in mm² or AWG, and whether it is solid, stranded, compacted, sector-shaped, or flexible. A product advertised for a wide size range is not necessarily approved for every conductor construction in that range. Ask the supplier to confirm the exact part number against the cable specification.
For an aluminum conductor, follow the lug manufacturer’s instructions on surface preparation and any approved compound. For a copper-to-aluminum connection, check whether the whole termination, including the palm and equipment terminal, is approved for the material combination. You can explore bimetallic cable lugs when a mixed-metal termination is needed.
2. Confirm the actual conductor range
Product pages may show a broad series range. That is not a promise that one physical lug covers the entire series. Request the model drawing or individual size table, including any inserts needed for smaller conductors.
For example, the published GGLDF CLL mechanical cable lug page lists the series at 10–300 mm²; the HB-P mechanical cable lug page lists 25–240 mm²; and the AUL mechanical cable lug page lists 25–630 mm². Use these figures to shortlist a series, then confirm the precise model and cable compatibility with GGLDF.
3. Measure the palm and installation space
The cable may fit the lug body while the palm does not fit the equipment. Check the terminal bolt size, number and spacing of holes, palm width, orientation, and available clearances. In a compact switchgear compartment, the body length and position of the bolt heads can matter as much as the conductor size.
4. Identify the bolt system and instructions
Ask whether the selected model uses conventional bolts or shear bolts. Obtain its installation sequence, torque or shear-head instructions, stripping length, and any prescribed conductor preparation. Never use the shear point or torque specification of another brand as a substitute for the GGLDF model’s instructions. If the project requires records of tightening, agree in advance on how installers will document the completed joint.
5. Verify the application requirements
Confirm the voltage class and equipment, indoor or outdoor exposure, compatible cable accessory or insulation kit, and any project-specific tests or standards. A lug used inside a medium-voltage termination must be checked against the entire termination system. Do not infer a voltage rating or certification from the label “mechanical cable lug.”
Installation and Inspection: What Matters on Site?
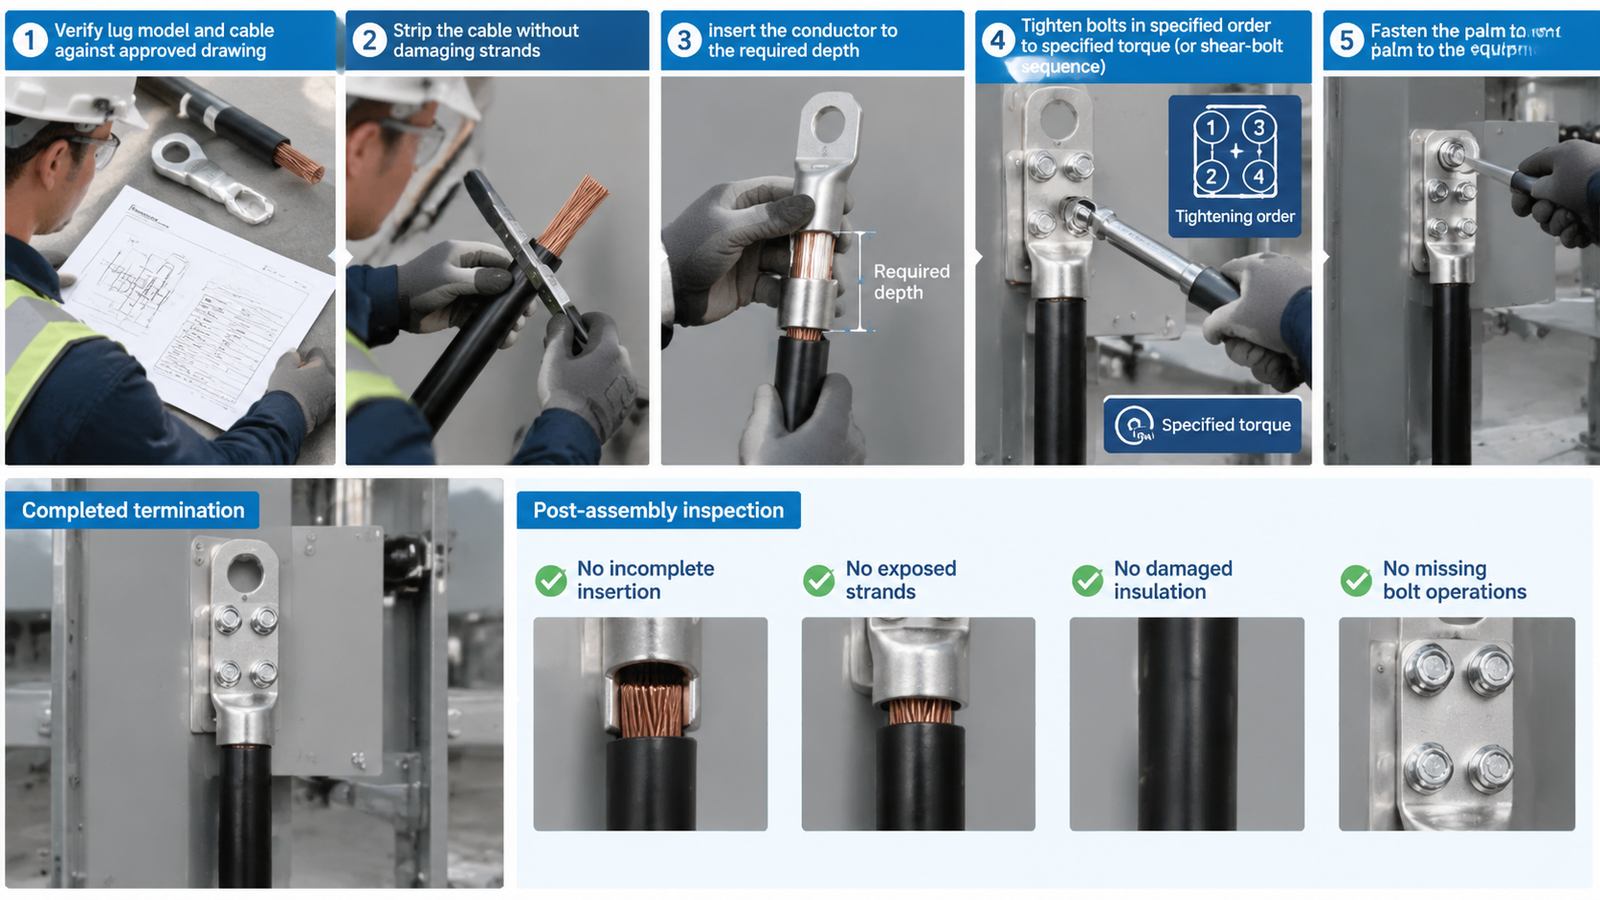
Installation must be performed by qualified personnel on an isolated circuit in accordance with the selected product’s instructions and applicable site rules. At a minimum, the installer should:
- Verify the lug model, cable specification, and equipment terminal against the approved drawing.
- Cut and strip the cable to the manufacturer’s dimensions without damaging conductor strands.
- Prepare the conductor surface as instructed, particularly when aluminum is involved.
- Insert the conductor to the required depth; confirm no insulation is trapped under the contact bolts.
- Tighten bolts in the specified order to the specified torque, or complete the shear-bolt sequence if the design calls for it.
- Fasten the palm to the equipment using the equipment manufacturer’s bolt and torque instructions, then apply the specified insulation or cover.
After assembly, check for incomplete insertion, exposed strands, damaged insulation, missing bolt operations, and interference with surrounding parts. A visible broken shear head can indicate that a step was completed on a shear-bolt design, but it does not replace the other inspection checks. Do not loosen and reuse a shear-bolt termination unless the manufacturer explicitly permits it.
Choosing a GGLDF Mechanical Cable Lug
GGLDF lists multiple mechanical lug families in its cable lugs category, including CLL, HB-P, and AUL. Their published series ranges overlap, so a series name alone is not enough to recommend a part. Send the following with your inquiry:
- Conductor material, construction, and cross-section.
- Equipment terminal material, stud/hole size, palm dimensions, and space limits.
- Required voltage/application and installation environment.
- Whether project specifications call for a particular bolt system, test record, or cable accessory.
- Quantity, destination, and any drawings or approval documents required by the buyer.
GGLDF can then confirm the suitable model, actual conductor range, drawing, and installation requirements before procurement. If you are comparing termination types more broadly, the site’s cable lug types guide gives the general overview.
Frequently Asked Questions
Do mechanical cable lugs need a crimping tool?
No. The conductor is secured by bolts or screws, so a crimping tool and die are not used for that connection. The selected lug may still require a specified wrench or torque procedure.
Are all mechanical lugs shear-bolt lugs?
No. Shear bolts are one design within the wider mechanical lug family. Check the exact model documentation before choosing the tightening procedure.
Can one mechanical lug fit copper and aluminum cables?
Some models are rated for both materials, but that cannot be assumed for every lug. Check the model’s conductor material approval and the compatibility of the palm with the equipment terminal.
Can I reuse a mechanical lug after removing the cable?
Do not assume so. Reuse depends on the model, bolt design, condition, and manufacturer’s instructions. A completed shear-bolt connection should not be treated as a reusable set-screw connection.
Is a mechanical lug better than a crimp lug?
The best option depends on the approved connector, cable, tools, installer procedure, and project specification. Compare the exact products and their documentation rather than treating either attachment method as universally superior.